Showing posts with label homemade. Show all posts

Wednesday, May 8, 2013

My experience with home made kombucha.

Well, kombucha. I'd only ever drunk the stuff you buy in bottles in the shops before and liked it. I never really even thought about making my own, until a coworker brought it up and offere to bring in some 'mother'.
The slimy jellyfish like lump in this jar is the 'mother'.

You need the mother first...I don't know how to make the mother from scratch, coworker just chopped a bit off hers to bring in. It is a fungus. It looks just disgusting.
Put 2 black teabags and 3/4 cup of sugar in a container and brew with 1L of freshly boiled water. Let steep until cool. Pour into a ceramic or glass bowl and tip in the mother and liquid it's stored in (some kombucha from previous batch).

Leave for at least 4 days covered with a tea towel in a dark place.
This is what will happen. I could have left it an additional day but got lazy. It goes a bit fizzy and grows a nice thick layer on top (which is the new mother).
Scoop out the new mother (I believe it's called a scooby?) and throw out the old mother. Put new mother in a jar with a little bit of the kombucha.
Strain kombucha into a glass or ceramic container and flavour as desired...I just put some lemon slices in. Store in fridge.

Start again!

The entire process is quite disgusting but interesting. The fungus feeds on the caffiene and sugar. It's probiotic. I wouldn't drink it on an empty stomach because of the probiotics...

Anyway, there you go. Kombucha. I've currently got my second batch in the pantry, and will leave it a little longer this time. =D

Monday, March 19, 2012

Roasted pumpkin soup

Roasted Pumpkin Soup
Serves 7 as a starter

Ingredients:
650g butternut pumpkin (weighed without skin)
350g kent pumpkin (weighed without skin)
1 whole head of garlic
2 small onions
2 cups chicken style stock (or veg stock)
coconut cream and reserved pumpkin seeds for garnish

Method:

 Preheat oven to 220 degrees C.

Chop pumpkin into 2 inch chunks. Cut onions into quarters. Put into a bowl with the pumpkin and mix in a bit of sea salt and cracked pepper, and two teaspoons of any neutral cooking oil (I use rice bran). Spread in a single layer on a baking tray. Cut the top off the garlic and peel off the papery part of the skin. Wrap it up in tin foil and stick on the tray with pumpkin. Bake for about 40 minutes or until pumpkin and garlic are soft.

Once cooled a little, put into a food processor (if yours is gigantic you could do it all at once but I had to do mine in batches) with the stock and blend until smooth. Pour into a saucepan.

For the pumpkin seeds you could leave raw or wash all the pumpkin pulp off them and dry fry them in a pan until toasted and then chop into pieces.

Heat soup just before serving. If you want it thinner add more water or stock. Garnish with pumpkin seed pieces and a tablespoon of coconut cream :)

----
 We had this as an entree last night at dinner. My garlic wasn't quite roasted enough so it was very garlicky. Perhaps put the garlic in the oven for 5-10 minutes before the pumpkin. Also my coconut cream was pretty much milk by the time I spooned it on. I'd suggest putting a can of coconut cream in the fridge overnight and using just the thick cream from the top of the can :)

The beauty of pumpkin soup is that it can be a started to pretty much anything and you can add any other seasonings you want (curry powder, italian herbs, etc). I find it quite filling so I try to make sure my main course (especially if dessert is a third course!) a fair bit smaller than usual so as my stomach doesn't explode.

I did have a dessert third course: Chocolate and vanilla ice cream sandwiches! Best idea ever by the way. I made the homemade vanilla ice cream from Veganomicon, and baked the Mocha Mama cookies from Vegan Cookies etc.
I bought the wrong kind of tofu for the ice cream but I just blended it a bit longer and it worked perfectly fine. I am so glad I only made enough ice cream sandwiches for everyone because I'd have eaten any leftovers all at once =D

One tip...make sure your cookies are pretty cold before putting the ice cream on them. Refrigerating would have been a good idea! As you can see it melted a bit. Still good though.

Tuesday, January 3, 2012

'Chicken' with Orange Teriyaki

Since it was my last day of holidays yesterday (sadface) I decided to make a fancy lunch. Because I can.

I found 'Seitan and Brocollini with Clementine Teriyaki sauce' on Vegan Yum Yum, thought it sounded fantastic and made it. I just used oranges instead of mandarins for the sauce because mandarins aren't in season at the moment :) The sauce is delicious and made heaps so I'm going to use it to make this again for Nadine for tea! It's a perfect balance of sweet and salty, and bonus points for making it at home - no more expensive bottled sauce. I only needed 2 dessertspoons of sauce to coat all my veg and soybean chicken bits, and it was a rather large meal. I used regular brocolli and some purple cabbage as my veges, and served it with brown rice.
I thought about making some seitan for it, but came to the conclusion that it was too much effort so I dug this soybean chicken out of the pantry. When I bought it I was intrigued and asked the guy at the counter what it was like. He said it was pretty good - and that it was apparently good enough for people to get angry at him when it was out of stock! Now, it is actually quite good, but since I prefer my protein to come mainly from unprocessed foods I don't think I'd abuse the store guy if it wasn't on the shelf!

It only costs $3.95 (where I got it) for a 200g packet, which has four servings in it. One serving is quite a lot, so you could probabaly stretch it to six or eight servings if you up the veges in your stir fry or whatever you're making.

What you do, is you boil the little dried pieces of whatever it is in some water until they are soft, then you drain and rinse with cold water. Proceed to use in any recipe you'd use actual chicken!
It comes out of the water looking disturbingly like cooked chicken pieces. Doesn't taste like it though, it's all about the sauce/flavorings with these things! The texture is pretty damn spot on ( I don't know how they do it!), and I wouldn't hesitate to reccomend this product to people wanting to give up chicken or those transitioning from eating meat to being vegetarian/vegan.

(I am not being paid to flog this product by the way.)

Wednesday, October 5, 2011

Been baking up a cyclone lately.

First, it was the bagels. (I also baked some carrot muffins on the same day as the bagels that I've posted about before).
And now I am foraying even further into the vast world of Bread.
With these pumpkin scrolls I found randomly somehow on veganbaking.net. Actually, they are called Pumpkin Cinnamon Rolls but to me they are scrolls. I've always called this type of thing scrolls. I opted out of the rum icing, because I had no rum (and whiskey would not suffice this time) and I don't really like icing. *get's shot by fellow bloggers* Besides, this bread is so sweet and so moist and so delicious it doesn't need any. When I make these at Christmas I'll probably put some on, you know, for presentation.
These are surprisingly easy to make. I only made a few substitutions: wholemeal plain flour + 1 tbsp gluten flour for the All Purpose, and rice syrup for the barley malt syrup.

These turned out so soft and like something you'd buy at a bakery. It tastes and has a texture like it was made with soft white flour. They taste to me like a perfect hot cross bun - I might even use this recipe for my buns next Easter. No one will notice they are orange...or they could just be pumpkin hot cross buns! They are sticky - I don't know how I'm going to manage one at work tomorrow, but we shall see.

So this is what I do when I chuck a sickie have a mental health day. Tell ya what, this business of breadmaking is very relaxing.

Tuesday, October 4, 2011

Homemade bagels!

You know, I don't know if I've ever eaten a storebought bagel before, but the idea of making my own has always been attractive...I'm just fairly lazy. I mean, they look like doughnuts but you put stuff like cream cheese on it. Or marmite. Mmm. All bagel recipes seem to be pretty much the same, but here is what I did.

Whole wheat bagels
Makes 8 smallish bagels

Ingredients

3 cups wholemeal plain flour (I use organic stoneground w/m plain flour, I buy it in bulk for $3.50/kg)
1 tbsp gluten flour
3 tbsp raw sugar
1 1/2 tsp dry yeast (instant)
1 tsp salt
1 cup warm water (I actually use a candy thermometer to check - 100 degrees F)

Method

Mix together flour, gluten, yeast and salt in a med-large mixing bowl. Stir 1 tbsp sugar into the cup of warm water. Add water to flour mixture and stir until a dough forms.

Turn out onto a floured surface and knead for about 10 minutes or until smooth. Put in an oiled bowl and let rise in a warm place for an hour. (I always turn my oven on for a few seconds, then turn it off and put it in there).

Meanwhile, fill a stock pot with water and stir in the remaining sugar. Bring to a boil when dough has risen.

Divide dough into 8 pieces, and knead lightly. Poke a hole through the middle and make into smooth bagel shape. Let rest in warm place for 15 minutes. Preheat oven to 200 degrees C.

Once water is boiling,  drop bagels in about 3 at a time (or however many fit in your pot) and boil for 30 secs, flip, and boil for another 30 secs. Drain.

Once all bagels have been boiled, put on a baking tray lined with baking paper. Bake for about 10 minutes (check after this to make sure - my oven is gas powered and dodgy).
Remoe from oven and cool on a wire rack. I hope that all makes sense. I'm so tired I've lost my eyes.

Serve with whatever you like to eat on bagels! I first put peanut butter and rice syrup on mine, then tried one with plain ol' nuttlex. Both awesome. Next time I'm going to make at least a double batch so I can freeze them. or eat all of them at once. The flour I buy makes everything so smooth. I first found it at Mrs Flannery's (and it made me realise that the white wings wholemeal flour may be unbleached, but it isn't actually a whole grain...it's white with bran mixed through.) But found it at a local bulk food shop for much cheaper.
Bob is a laydee.

And I am very sad. I left the plate I used in the top photo on the arm of the couch...and Charlee broke it :(.

Monday, August 29, 2011

Mmm peanut butter

I make my own peanut butter once or twice a week, depending on how much we feel like eating. I usually buy raw peanuts with the skin on, dry roast them in a frying pan until little black spots appear and then blend blend blend! This takes about 10 minutes, sometimes longer, but the end result is always amazingly delicious. I ahven't bought any peanut butter from the shop in aggges. The homemade stuff does go very solid in the fridge though (no added oil). Which brings me to my next point.

I was given a kg bag of roasted unsalted peanuts by my stepmum (hooray! I was just about to go to the shop to buy more) so I decided to just make the peanut butter from these instead (I don't really like to eat peanuts by themselves).
I stuck two cups of the roasted unsalted peanuts in the blender, turned it on, and in no time at all I had a smooth butter. I didn't even have to scrape down the sides! Ahh and it tastes like the store bought stuff but better. I'm assuming it butterised so quickly because they are roasted with oil. It also doesn't solidify too much in the fridge.
Mmm, peanut butter.
Homemade peanut butter and homemade choko jam on home baked bread. Smug! Hahaha.

Wednesday, July 27, 2011

Home sewn reusable sanitary pads

Two items that I think are absolutely essential to my lifestyle, and save me a crap ton of money are my soy milk maker, and homemade reusable sanitary pads.
That's right! I've been using them since I was 17 and haven't looked back. Unfortunately for most of us, periods are unavoidable. But I decided I can prevent the bazillions of throw away pads I'd use each month (and the bazillions of dollars I'd spend on them) going into landfill and/or the ocean and waterways by using these ones I've made myself at home using a simple pattern and a sewing machine. These things last forever. I've still got and am still using the first one I bought at Woodford Folk Festival in 2006.
I make them from nice soft flannelette material that I've either got from op shops (I got 3 single bed sized sheets for $2) or found lurking in the cupboards. You could also recycle old flannel pyjamas you don't wear anymore, or any sort of other cotton clothing really, or even towels.
This website has the basic pattern I used, I just made mine square. At the bottom of the page are a few other resources for patterns/information too. Just type in 'homemade sanitary pads' into google.com and heaps of results will come up. I like these because they have a pouch like thing that I can put extra layers in on heavy days. I think people may be uncomfortable using these because they may think that the blood would just go right through - and this may be too much information - but I bleed like a banshee and have never had any leaking problems.
Omg! my nails are clean!
If you don't want to bother/can't sew/whatever, there are hundreds of different cloth pads on etsy.com (support artists!). You can even get g-string shaped ones if that's your style. There are also commercial companies that make them: Moon Pads (almost 100% sure this brand was the one I got at Woodford). 
This is the insert layer, I usually make it from three layers of material and quilt it so it doesn't go out of shape.
Now, cleaning. The part that turns people off. I've tried many different ways of cleaning them. I started by just hand washing (since I lived at home and didn't want anybody else to touch them or think I was weirder than I already was!) which works, but stains will remain. Now I soak them in a bucket of cold water (hot water sets stains apparently) with salt . Vinegar and eucalyptus oil is good (stops any smells and helps remove or prevent staining). You can aslo try baking soda. If you have pets, it is perhaps a good idea to use a bucket with a lid (this is also handy for when visitors arrive unexpectedly). Keep it in your bathroom next to the loo. Apparently, the soaking water/blooood is good for plants (obviously make sure whatever you add is safe too! For instance, I wouldn't pour baking soda on my garden, or vinegar). Just drain the soaking water and throw them in with your normal laundry. We do laundry every second day anyway, but they'd be ok soaking all week if you want.

I can't really praise these enough. I go to work with these (I just have a plastic bag in my bag to put used ones in to wash when I get home - I intend on making a proper pouch for them though). Perk - I don't have to touch the rank sanitary bin that people always seem to get blood all over when disposing of their plastic ones. I run/yoga/pilates while wearing these and they don't go anywhere. They don't get in the way at all.

Not into pads? Give a cup a go. The Keeper is one kind, but I've seen others. I've always hated tampons anyway so I just go with the pads. I might try it one day when I have a million dollars. They are expensive but apparently they last over 5 years. That's a lot of laundry saved. I couldn't find anything on the keeper webpage but you could probably swim with the cup. I don't swim very often anyway/afraid of sharks eating me so I don't really care about being able to swim on my period.

I use these for a few reasons: to save money, to help the environment, and I believe they are healthier for my body. Commercial pads itch me like crazy and cause shafe (I think I'm just allergic to plastic), so these nice material ones fit the bill perfectly. Give them a go :)

Tuesday, July 19, 2011

It seems a sin to toast freshly baked bread..

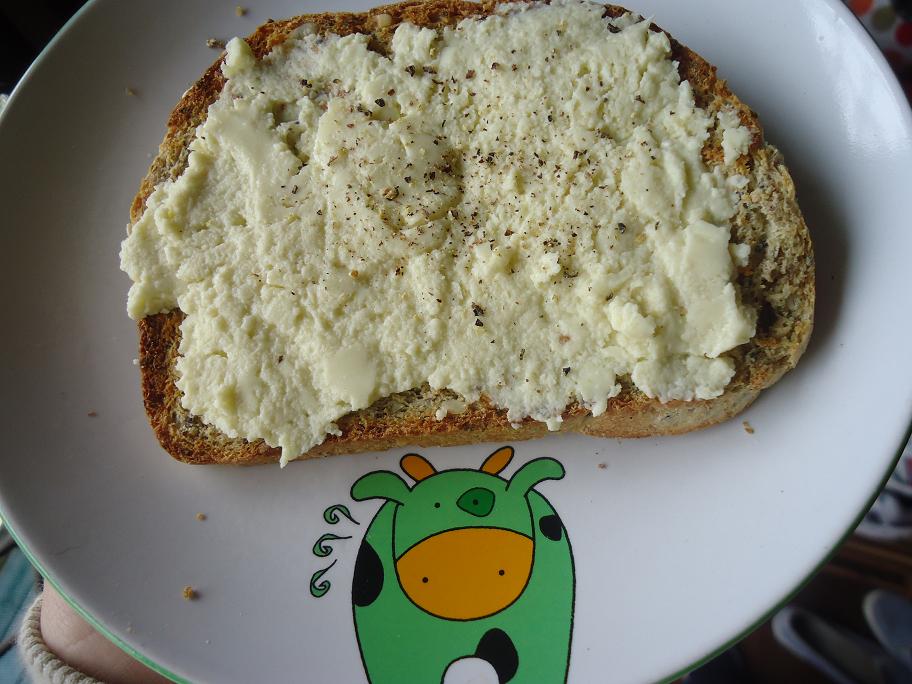
As you can see the cheeze doesn't really melt - it softened though. And the toastie tasted amazing.

After a second rising
I've discovered something that makes my bread less dense and rise a little more - blackstrap molasses. I always knew sugar feeds yeast but I was unwilling to put it in my bread, but then I thought, wouldn't molasses do the same thing? And at the same time my bread would get a little bit of added iron and calcium and other good things? Indeed.

Mmm.
Just follow the same recipe as my bread from before, just add 1.5 tablespoons of molasses to the water before you warm it up. (I just went and looked at my recipe, and discovered I haven't even been following it - I use 500g flour now for some reason. )

Seedy bread
Makes 1 loaf

Ingredients:
500g wholemeal flour
50g gluten flour
1/2 tsp salt
2.5 tsp instant yeast (you can buy this in a big tube at woolies - keep it in the freezer.)
1.5 tbsp blackstrap molasses
Seeds of choice (I usually use 2 tbsp each of: sesame, flax, poppy and sunflower. I also like adding pumpkin seeds.)
about 1 1/2 cups warm water

Method:

Mix together flour, gluten flour, salt, seeds and yeast. Make a well in the center and pour in the warm water and molasses mixture (start with one cup).

Mix the dough, adding more water until a firm elastic dough is achieved.

Turn onto a floured bench. Knead for 5 minutes or until smooth. Place in an oiled bowl and let rise for about an hour or until double in size.

Knead again lightly. Press out dough gently to about the length of your loaf tin and roll it up. Place the rolled up dough in the tin with the 'seam' side down. Let rise again until doubled.

Bake at 200 degrees C for 30-40 minutes or until brown and sounds hollow when tapped.

----
I always grind my flaxseeds before doing anything with them - you can't digest them if they're whole, and therefore would not get all the nice nutrients from them! You know, like omega 3.

Anyway, this is about my sixth loaf of bread I have made at home since the last time I bought any at the shops. It's awesome. I'm getting quicker at just whipping it up when I get home from work if we've run out :) Though I usually do it on Sunday afternoons and make all the neighbours jealous at the smell of baking bread wafting through the air!

Saturday, July 16, 2011

No cows were harmed in the making of this cheese toast

I made some cheeses from the Ultimate Uncheese cookbook today :) The above is the brie, which kind of actually tasted like brie - it had the moldy aftertaste somehow. I may have been imagining it.
On the left is the colby cheese - pretty tasty, will be excellent on sandwiches and toasties, or even grated and melted on pizza. Right is the brie, and the one at the bottom is a raw macadamia cheese from Addicted to vegies. It's the best one! So easy to make (all of them are easy to make) but the raw macadamia one had the most flavour. I served them as a cheese platter with carrot sticks, celery sticks and chickpea crackers. I don't think I'll ever spend heinous amounts of money on storebought vegan cheese substitutes again, all three of these tasted better than any I've had, and I know exactly what ingredients are in it. I think I've had about a years worth of vitamin B12 today alone!

The two cheeses from the Ultimate Uncheese cookbook are both set with a fair amount of agar agar powder so it could get expensive, but that depends on where you buy it. I get mine in little packets from an Asian supermarket in the city for $2 each, so it's not going to break the bank for me.

Now, I don't miss real cheese at all. I also do not think substitutes are necessary for a vegan lifestyle or diet to work, but I reckon it's fun to make things like this every once in a while :) Just cuz I can.

Sunday, June 19, 2011

Homemade steamed buns!

As with a lot of things I make in my kitchen, I've been wanting to try my hand at making my own steamed buns for ages now. I've had about a cup of dried azuki beans in a jar for months. Everytime we go into an Asian supermarket (rarely) I buy a packet of the frozen red bean buns. They're always good, but you know, have numbers in the ingredient lists and way too much sugar!

Anyway so today I cooked up my cup of azuki beans, and when they were nice and mushy, drained off most of the water, added almost half a cup of dark brown sugar (all I had left - is enough) and mashed them all up into a paste. It was the perfect oppurtunity to make these buns as I had just the right amount of white self raising flour to use up before the weevils arrived. (By the way, I keep my flour unsealed in the original paper bags next to my stove/oven, and I haven't had a weevil infestation yet.)

I used this recipe I found while looking for one on google, and made only half of it. I also ignored the savoury filling recipe.
They were really very easy to make!
They were really tiny when uncooked and just twisted up, but during steaming expanded to at least twice as big (obviously because of the yeast and self raising flour). I was worried they wouldn't hold together but they were just fine. We had them with a cup of tea :)

Half the recipe makes 12, but I only cooked up four, opting to freeze the rest uncooked. I'll get back to you on how they turn out - I should imagine they'll be right. I also had an extra half cup of red bean paste and I froze that too, so I can whip some more up when I run out! I also bet custard buns would be good. I bought one by accident when I was at uni and didn't like it, I think because of the egg, but if I make my own custard they should be delicious!

Thursday, May 26, 2011

Homemade Laundry Detergent

We make a lot of everyday things from scratch at home, instead of purchasing at a shop. Some I have posted here on this blog: lip balm, deodorant, milk, bread, nut butter, (I couldn't find the deodorant entry!). But there are many more things I make regularly that haven't quite made it on here yet, but that I intend on eventually posting :)

We do this for a number of reasons. It saves us a helluva lot of money, it's healthier for us and the environment (no harsh chemicals), and it's surprisingly easy. And of course fun, because I am a nerd.
I am very happy Nadine has started to embrace her inner homemade nerd-dom! She decided one day that it would be fun to make laundry detergent, and reap the benefit of the fact that it costs a fraction of the price of the stuff we usually buy (Earth Choice).

I'll write the recipe here - she found it online somewhere, and I reckon it's pretty generic, but if it's yours give us a yell and I'll take it down.

Laundry Detergent
Makes enough for 160 washes

Ingredients

1.5L water
1 bar of soap, grated (you can use any kind, just the average size)
1/2 cup washing soda*
1/2 cup borax**

Combine water and grated soap in a saucepan. Stir over a medium heat until soap is dissolved.

Add the washing soda and borax and stir until thickened.

Pour into a 10L bucket or container with lid and fill with hot tap water and stir.

You can add a few drops of essential oil for fragrance if you like :) We used eucalyptus.

Use 1/4 cup per wash, or less if you like! We keep it in a plastic storage container, and decant it into a recycled Earth choice detergent bottle.

*Washing soda is sodium carbonate. you can buy it in crystal form at Woolworths but I think you can also get it as a powder. (1kg for $5)
**I found borax at Bunnings once for 1kg = $6. Nadine has recently seen borax at Woolies though.

Nadine says this detergent has made our clothes particularly soft! I hate to say this but I don't know because I don't do the laundry very often!


Saturday, April 16, 2011

Homemade Tofu Failure :(

I bought myself a few kitchen goodies for my birthday (asking mum to get me a tofu press would be just weird!!) I'm all about using less packaging in our household, so homemade tofu is a great idea! (And in theory would save money, and trips to the shop...which is only across the road, but I'm very lazy.)

This is the second time I tried to make it. For some reason there's hardly anything! I don't know what I did wrong. I followed the directions on the coagulator packet to the letter! Oh well, trial and error. It's not as bad as the first one. I managed somehow to pour my entire mixture down the sink before I could even begin to press! Duh. Good thing I bought two lots of the coagulator!

This one tastes like tofu, it's a little crumbly, but solid.

If at first you don't succeed, try, try again.

And again.

:)

Wednesday, April 13, 2011

Hot Cross Buns recipe and a little catchup on some mending

So I took another sick day at work. Hopefully I have enough hours to get paid for it! Anyway, I ended up making a lovely spicy chickpea dish from Stephanie Alexander's Kitchen Garden Companion called 'Chickpea and Tomato Curry' for dinner last night. I won't post the recipe because I followed it pretty much exactly, but it was basically chickpeas, tomato, onion, garlic, ginger and a delicious spice mix made from whole peppercorns, cardamom, garam masala, cinnamon, chilli powder and tumeric. So good, yet simple and fairly quick to make (if you don't count the hours it takes to cook dried chickpeas!)
I had just a small bit which took me ages to eat, with some brown rice. For some reason 2/3 cup uncooked rice made enough for 3! I usually do 1/2 cup each. Odd. We figured out I had a light fever so I opted then to stay home from work today whether I felt fine or not.
So in order not to waste my day, I randomly decided to start my mending! (I have a huge list). The first thing I picked up was my favourite winter hat (I don't know what it's made from; I got it years ago from a friend). As you can see it has a big...gap? tear? what would you call that? that needs fixing. It's been like that since I got it, pretty sure.
So I got out a crochet hook and fixed it! You can hardly tell, no? Since it's getting cooler now I should really start crocheting things again. I haven't done any for ages and I do enjoy it. I still have a half finished bolero I was making for Nadine about 3 years ago!
On to the Hot Cross Buns! As you can see, the crosses melted into the bread. Oh well. But anyway they turned out really soft! I was quite surprised.  I made a half batch so only 8, but I've been sitting around all day in my fat pants (so comfy) eating toast and these buns with heaps of margarine, so for next week I'll make at least double.

Hot Cross Buns
Makes 8

Ingredients

1 sachet of instant dried yeast
1/6 cup caster sugar
1/2 cup warm soy milk
1/2 cup warm water
2 cups plain wholemeal flour
1/2 tsp allspice
1/2 tsp cinnamon
1/2 tsp salt
heaping tbsp vegan margarine
1/2 cup currants
1 tbsp chia seeds mixed with 1/4 cup of water

1 tbsp caster sugar and 1/4 cup water for the glaze

Method

Mix together all dry ingredients. Add margarine and rub in with fingers. Stir through chia goo and slowly add in warm milk/water until a soft dough is formed.

Turn out onto a floured surface and knead until dough comes back when pressed.

Put into an oiled bowl in a warm place for 1 hour or until doubled in size.*

knoack back dough gently and divide into 8 even balls, and set out on a baking tray. (I used my pizza pan.) Let stand in a warm place until double again (doesn't matter if they touch). Turn oven to 200 degrees Celcius.

Bake for 15-20 minutes or until buns sound hollow when tapped.

Make a glaze by boiling the sugar and water until sugar dissolves. Brush onto warm/hot buns.

Eat when cooled down a little!
I, of course, had a few when they were fresh from the oven, but today I toasted them under the grill.

They were sweet and a little sticky from the glaze, just like they should be. I didn't bother with buying any fruit peel because I never use it all. I only just through out the rest of the bag from last year! I won't bother with the crosses next time, maybe. They worked last year (I did it differently) but maybe I just can't be bothered. Ha.

*I turn on my oven for a few seconds then turn it off. Perfect breeding ground for yeast!

Thursday, March 17, 2011

Almond milk

I splurged and bought myself a soy milk maker a little while ago, and let me tell you, it's been getting a workout! And it's certainly very worth it. Through trial an error I've come up with a soy milk recipe we both like, and I can make it for 50c for 1.5L. Awesome. (The recipe is 100g whole organic soy beans, soaked but unskinned, and 2 tbsp unsweetened dessicated coconut by the way. I got the coconut idea from Theresa at the Tropical Vegan.)

Anyway, we were getting over soymilk, well I was because I'd been eating cereal every morning because it's quick to eat before work, and I just happened to have a kilo bag of almonds and I though why not almond milk? I used to make almond milk myself with a blender and lots of patience and it was delicious (and raw) but my patience ran out so I stopped doing that. 
Ignore the cheeki bottle, I'm going to write another post about those later

For my almond milk using the machine (so much easier, funnily enough) I put 100g raw almonds in to soak for at least an hour, put them into the little filter basket, filled the jug up with 1L of water and pressed the appropriate buttons to make the machine NOT* cook it and waited. 

The end result is a lovely sweet tasting creamy almond milk. I still can't get over how these non-dairy milks are all white, by the way.

It's awesome on cereal. Works well in baking.
Makes a pretty good hot cocoa.
And an even better banana-mixed berry-chia seed-smoothie!

I haven't tried it in coffee or tea because I don't drink those beverages with milk! So you'll have to give it a go yourselves.

I can make 1L of raw almond milk, unsweetened, for $1. Cheaper almonds can be found, however, so it could cost less. Do you know how much this stuff costs in the stores? Like $10, no joke. That's why I've never had storebought before! I've got a whole list of expensive-to-buy non-dairy milks to try and make. Quinoa is one of them. Oat milk. A rice milk that tastes good (haven't been too successful yet!) Hemp? Hmm..

Oh! And it's so so so much easier to clean. All I have to do is rinse the filter basket and the blades and give the heating thing a quick wipe. All clean. With cooked soy I have to scrub the damn thing even if I do it striaght away!

*When I made this using my machine for the first time I used the same process as for soy beans, which cooks the milk...it separated and was gross. So raw it is!

Monday, March 14, 2011

Homemade Kalamata Olive and Herb Bread

Nadine and I often buy fancy bread from the European bakery that's conviniently open across the road for weekend breakfasts, and our favourite is the kalamata olive loaf.

However, it costs $6, it's made from white flour and also has a million unescessary other ingredients in it's long (vegan, I checked, the poor guy at the counter was very flustered haha) list. Sugar, preservative numbers, this, that, the other. But damn it is a tasty bread.

But since I can't afford that sort of money for bread anymore (or their delicious traditional German pretzels homg) or ever really could, I decided one weekend to just make some.
*drool*

It turned out pretty awesome.

Kalamata Olive and Herb Bread
Makes 1 loaf

Ingredients

450g wholemeal flour
1 sachet of instant dried yeast (this is about 2.5 tsp)
1/2 tsp salt
50g gluten flour (vital wheat gluten)
2 tbsp (or more!) or mixed dried herbs or your favourite
100g chopped or sliced kalamata olives (make sure there are NO pits! it's not worth losing a tooth over)
Enough warm water to make a firm moist dough

Mix together flour, gluten flour, salt, olives, herbs, and yeast. Make a well in the center and pour in the warm water (start with one cup).

Mix the dough, adding more water until a firm elastic dough is achieved.

Turn onto a floured bench. Knead for 5 minutes or until smooth. Place in an oiled bowl and let rise* for about 1/2 an hour or until double in size.

Knead again lightly. Press out dough gently to about the length of your loaf tin and roll it up. Place the rolled up dough in the tin with the 'seam' side down. Let rise again until doubled.

Bake at 200 degrees C for 30-40 minutes or until brown and sounds hollow when tapped.

Try to let it cool down before you slice it or eat it!

*I have a gas oven at home so I light it for a few seconds then turn it off and leave the dough to rise inside. It works perfectly.
In this particular loaf I made I put in too much water, and it didn't rise as much as my regular whole grain bread. But next time I'll remember about the water! I also didn't bake it long enough, it was a little doughy in the middle. And I sliced it while hot. I got impatient. Don't get impatient, it's better when cooled down!!

But the overall result was awesome, and next time we want a fancy bread for breakfast I'll make it again!

The possibilities are endless. Maybe I'll add chilli, or caramelised onion next time.

Sunday, March 13, 2011

Cashew nut butter

I've been meaning to make my own nut butters at home for a while now. I always sort of thought you needed a fancy schmancy hardcore blender like a vitamix or something to make them, but you really don't.
First, I got 150g whole raw cashew nuts (just over 1 cup) and put them in a dry frying pan (no oil) and toasted them until they started to brown. Don't burn them!
I pulsed them a few times in my normal everyday food processor from the 70's so not to stress it out too much at once.
Blended for a minute or two and it turned into dust and started clumping slightly.
I gave it a rest every now and then, to take the pictures and not burn out the motor.
Gradually it clumped up as the oils started releasing from the nuts.
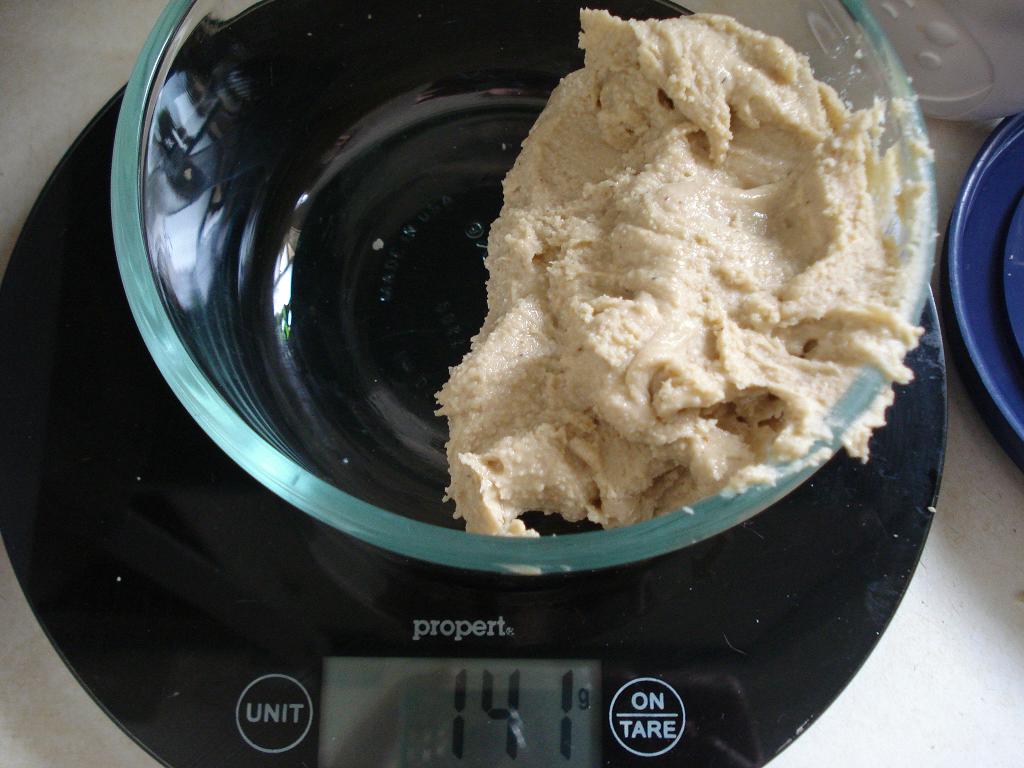
Dough? Keep blending!
Suddenly it will turn into smooth smooth buttery goodness.
I stored it in an airtight container in the fridge. I only lost 10g of nuts from it, mainly from me taste testing and whatever I couldn't scrape off. I didn't measure it in cups, but my guess is the yield would be just over half a cup.

At shops I've seen cashew nut butter cost anywhere between $6 and $10 for the same amount (150g), this little batch I blended up only cost me $3. If I didn't buy stupidly expensive nuts from the fruit shop, it would probably cost even less.

Oh, and it's absolutely delicious.
I put a blob on top of some Banana Rye Muffins I made today. I'll post the recipe another time :) There's too much in this post as it is!

Being in the fridge, it does go really solid, but I don't really care about that. Next I might try almond or brazil nut butter :)